
Blogs
AEM-DTM-Target integration takes advantage of the tremendous extensibility of AEM. The primary aim is to integrate AEM with Adobe Target to enable the creation and delivery of personalized experiences for specific audiences. However, using DTM as a technology bridge will facilitate the integration of AEM with Target.
Let’s start by introducing the three solutions in Adobe Experience Cloud.
- AEM – Adobe Experience Manager (AEM) is a web content management system with powerful features to manage, organize and deliver enterprise content with best-in-class experience. AEM came to Adobe with the acquisition of Day Software in 2010, earlier it was known as Day CQ (Communique). For this article, we are using AEM 6.3 version.
- DTM – Dynamic Tag Management(DTM) is a solution that offers tools to integrate Adobe Experience Cloud solutions as well as third-party solutions like Google Analytics etc. DTM used to be known as ‘Satellite’ before Adobe acquired it in 2013.
- Target – Adobe Target is a personalization solution of the Adobe Experience Cloud suite, which delivers the personalization of content based on different type rules. Target came to Adobe with the acquisition of Omniture in 2009. In this article, we are going to demonstrate the Target VEC (Visual Enhanced Composer) capabilities.
Architecture:
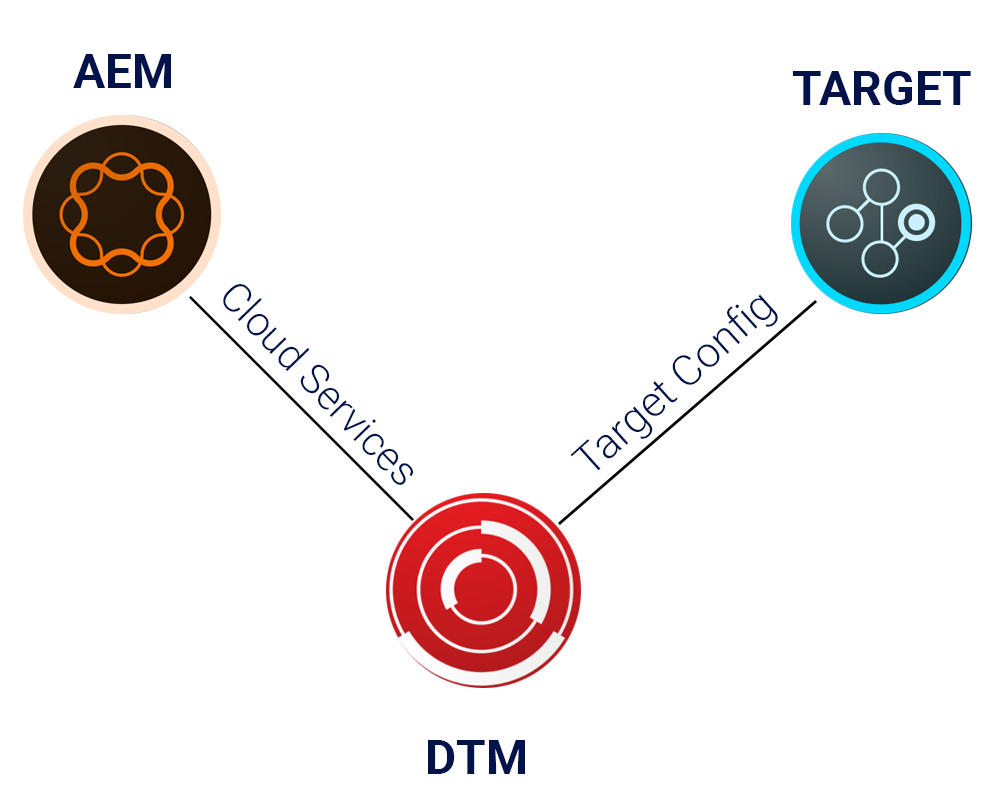
AEM can be integrated with Target directly without using DTM. However, it’s recommended to use DTM in between due to listed benefits:
- Efficiency –DTM allows you to optimise the loading time of multiple tools and marketing tags.
- Reduced Cost – Minimise the development cost as once Data Layer is in place multiple solution can leverage the same.
- Flexibility – DTM allows you to quickly test and optimise tags without being bound by release cycles.
- Multiple Sites – Using DTM you can manage multiple sites from the single console.
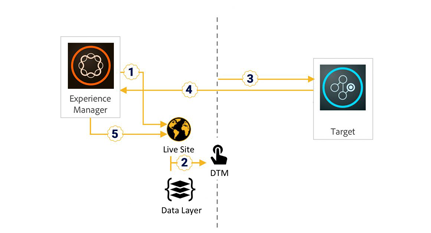
AEM is usually connected with DTM using AEM Cloud Services and Target is connected to DTM using Experience Cloud configuration. Here is the relevant diagram for AEM-DTM-Target integration.
Request Flow for AEM-DTM-Target Integration:
How a request flows from AEM to Target via DTM:
- AEM starts rendering a site page.
- Site has a DTM script attached along with Data Layer. DTM script is associated with a relevant property. Data Layer discussed below.
- DTM Property has Target added to it, which raises a request to Target and share required data.
- Target pushes its response back to AEM instance using mbox js. Note: Now mbox.js has a newer and updated alternative which is known as at.js
- AEM page got Target response which gets rendered on the page.

Data Layer:
As you might have noticed in request flow that AEM site has got the DTM Script and Data Layer associated. Data layer is a W3C standard to store values in javascript object. Data layer is created at AEM and consumed by DTM to get the required data from AEM instance and push to any solution like Analytics, Target, etc. We are going to create a sample data layer below in DTM Rules section.
DTM Setup:
To get the access of DTM, one has to raise the request with Adobe Client Care with proper information. Once the access is granted, go to https://dtm.adobe.com and login with the credentials provisioned by Client Care.
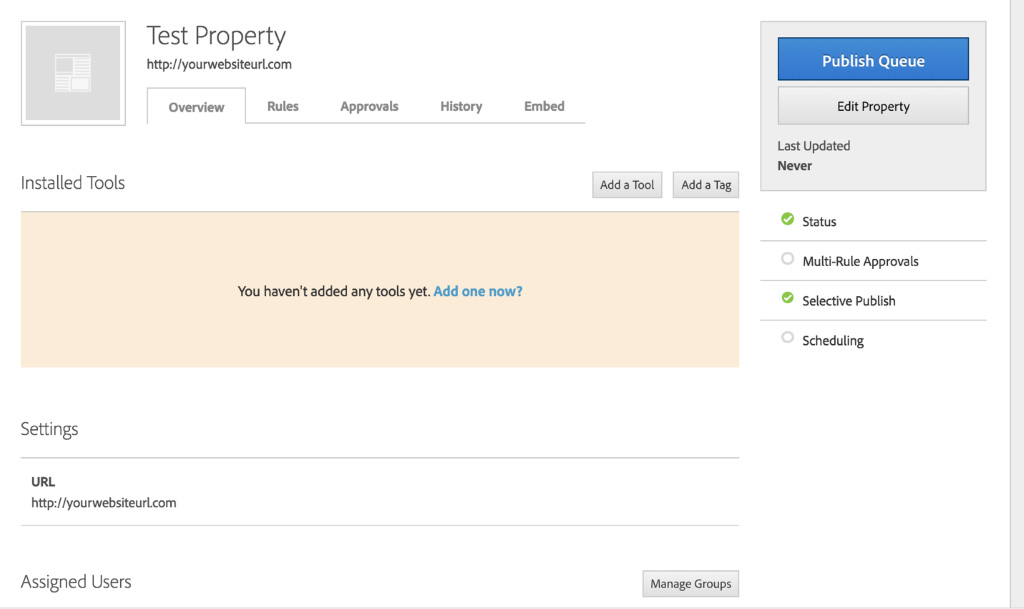
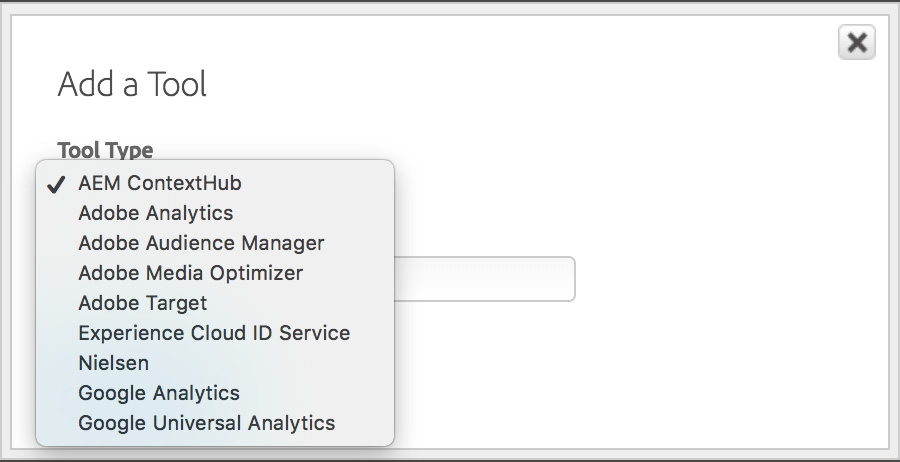
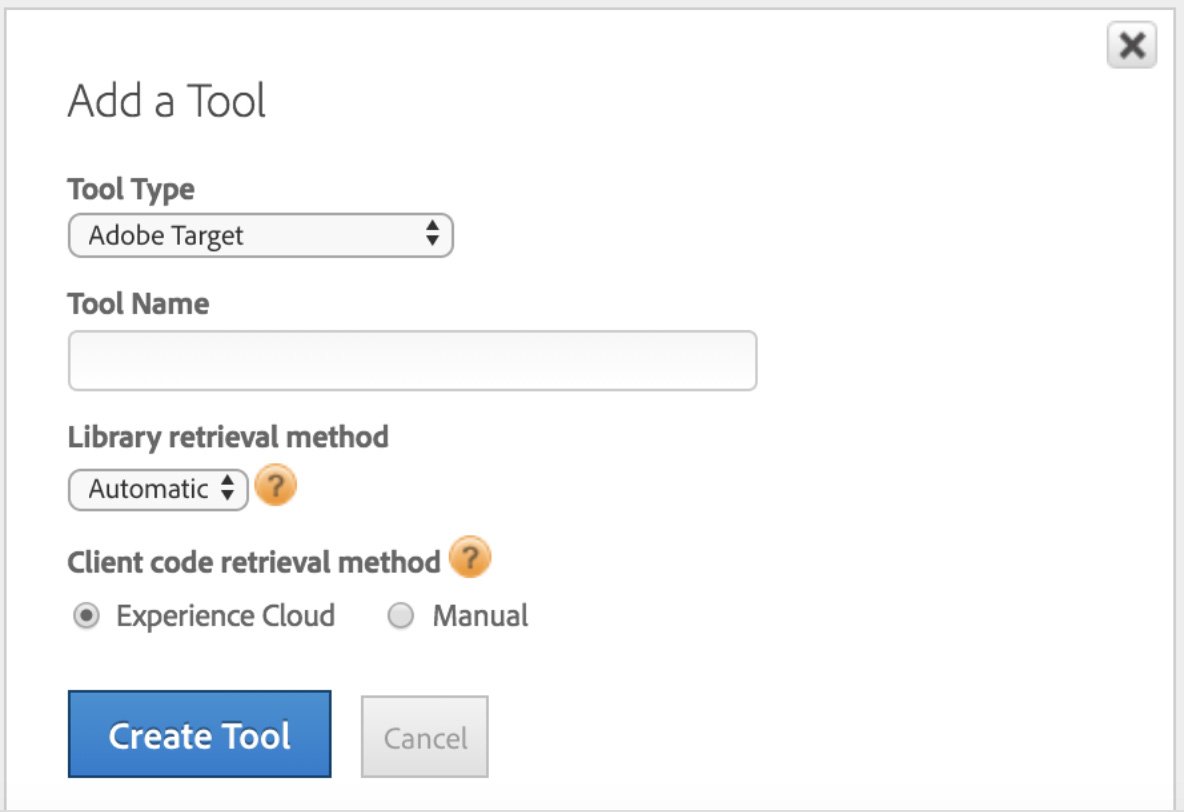
To start with DTM, create a new property with the URL of the website. Thereafter add the required tools in the property like Adobe Analytics or Adobe Target. In AEM configuration, we are going to use same DTM Property in order to integrate the AEM with Analytics, Target, etc.
For this article, we are going to add Adobe Target as we need to carry out AEM-DTM-Target integration. To do this, we need Client Code which will be provided by the Client Care or alternatively you can try adding using Experience Cloud membership.
DTM Rules:
In above steps you have created a new DTM property, added Target as a tool in the same property. Now you need to know how to play with data, DTM uses data layer to get the data from AEM instance. For example, using Target you need to render the homepage of your website based on the browser, location, devices, etc or you can also get user-specific details like age, gender, interests, etc. Hence you need to get all such information from AEM in data layer. For example, here is the data layer:
   var dataLayer = {}
   dataLayer.page = {
        pageInfo: {
            pageName: document.title,
            url: document.location
        }
   }
Once the data-layer is all set, fetch the values from data layer and set it in DTM data elements. We use these data elements in different types of rules. DTM has got three type of rules:
1. Event Based Rule – Rules executed when visitor interacts with on-page elements.
2. Page Load Rule – Rules executed when visitor loads the page.
3. Direct Call Rule – Rules executed when you want to tell DTM to do something specifically.
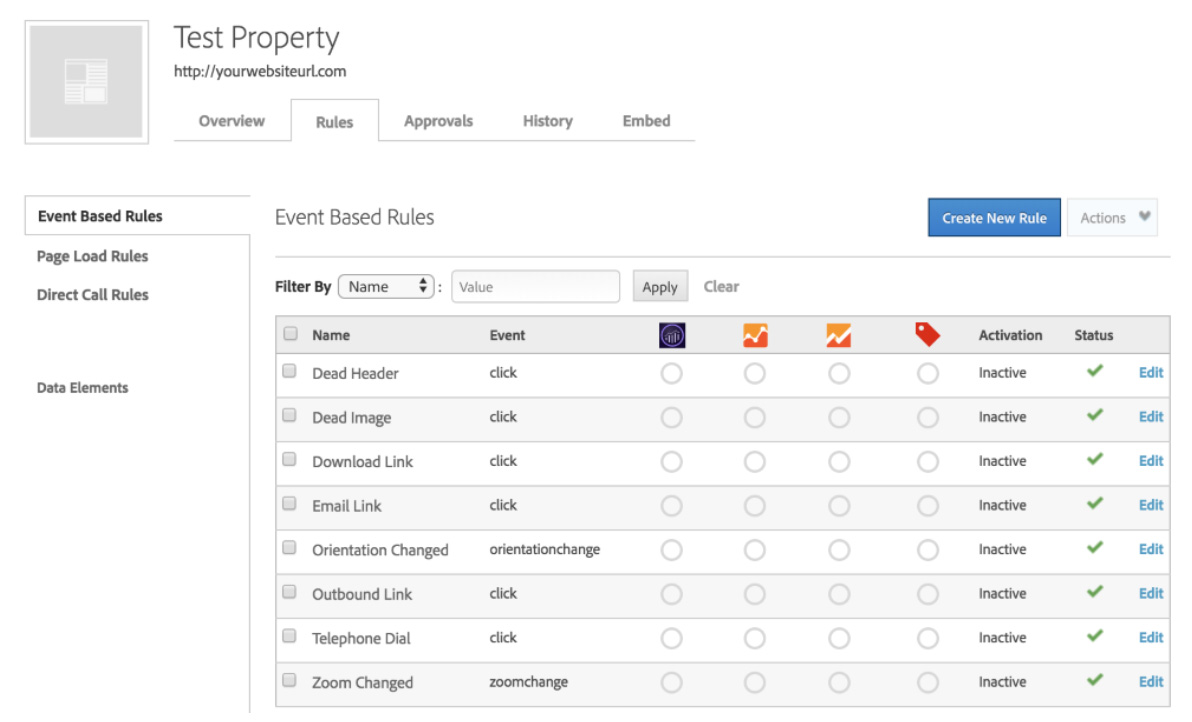
Fig: DTM Rules
Creating a data element using data layer is quite straight forward. You can see the below screenshot, here we have created a new data element Page Title which is mapped with pageName field of data layer created above.
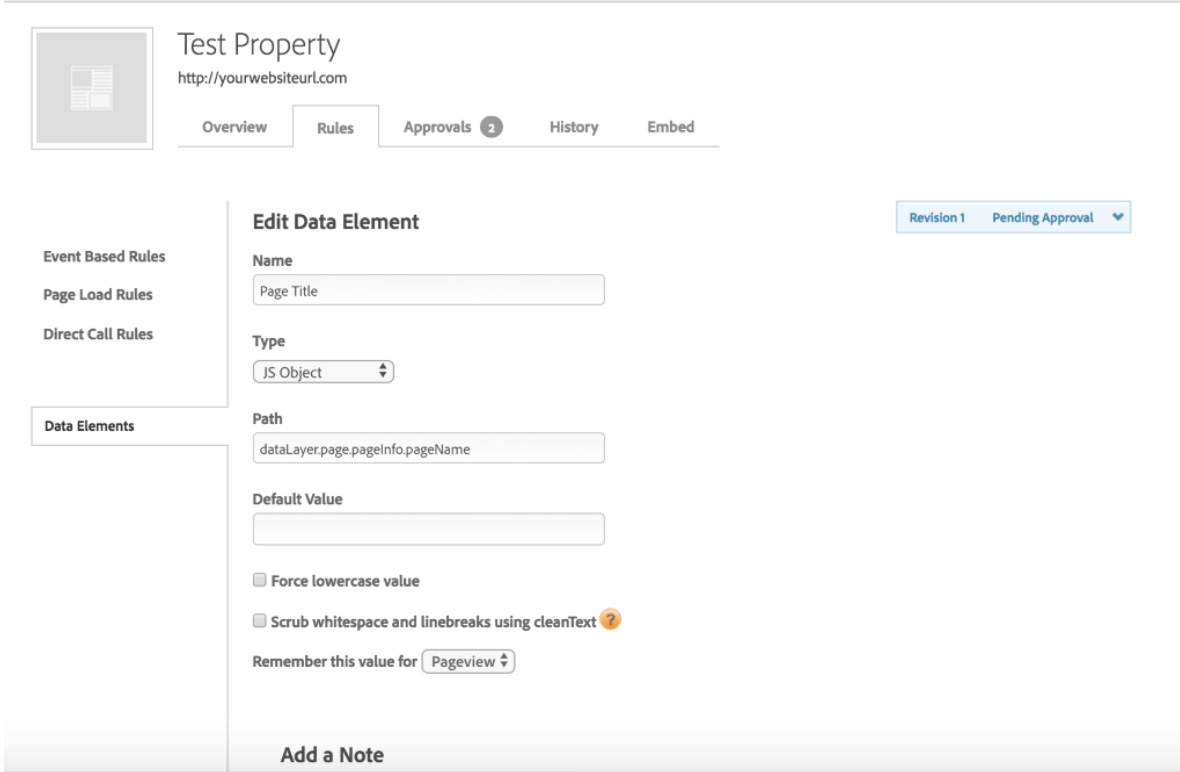
Fig: Data Elements
DTM Workflow:
Every property in DTM follows a standard workflow. Workflow has got three steps:
- Creation of property and rules.
- Approve the newly added and modified rules.
- Publish the property to make the changes live.
AEM-DTM Integration:
There are two ways to integrate DTM with AEM:
- Using Cloud Services
- Embed JS
- Using Cloud Services:
Using AEM admin console, go to Tools > Deployment > Cloud Services. Find ‘Dynamic Tag Management’ and click on ‘Configure now’. Provide a Title and Name of the configuration keeping Parent Configuration field intact. Enter the details as below:
| Property | Description |
| API Token | The value of the API Token property of your Dynamic Tag Management user account. AEM uses this property to authenticate with Dynamic Tag Management. |
| Company | The company with which your login ID is associated. |
| Property | The name of the Web Property that you created for managing the tags for your AEM site. |
| Include Production Code on Author | Select this option to cause the AEM author and publish instances to use the production version of the Dynamic Tag Management libraries. When this option is not selected, the Staging Settings apply to the author instance, and the Production Settings apply to the publish instance. |
There is an option to self-host the DTM libraries which means AEM will host the DTM libraries if this option is checked, if we want to use the libraries from the cloud then we should uncheck this option. Here we are using later one.
- Embed JS:
Go to the DTM Console using https://dtm.adobe.com and click on the relevant property.
Go to Embed tab, copy the Header and Footer staging script, go to the AEM author instance and copy the script in header and footer of the website respectively. Similarly, copy the header and footer production script and put in the AEM publish instance.
Let’s say you have integrated DTM with AEM using one of the above-mentioned method, assign the DTM config to the root of your site using AEM Sites console.
DTM-AEM Connection Test:
Now you need to test whether DTM script is getting loaded with your website. In browser, try to open any page of your website where you have assigned the DTM config and open browser console. If “_satellite” object exists then it means DTM script is getting loaded. You can also try retrieving the data elements that you have created in DTM using “_satellite.dataElements”. If you are able to find all the details, you are good to go.
If _satellite object doesn’t exist, it means page doesn’t have the DTM header/footer script. You can view the source of the page to confirm the same.
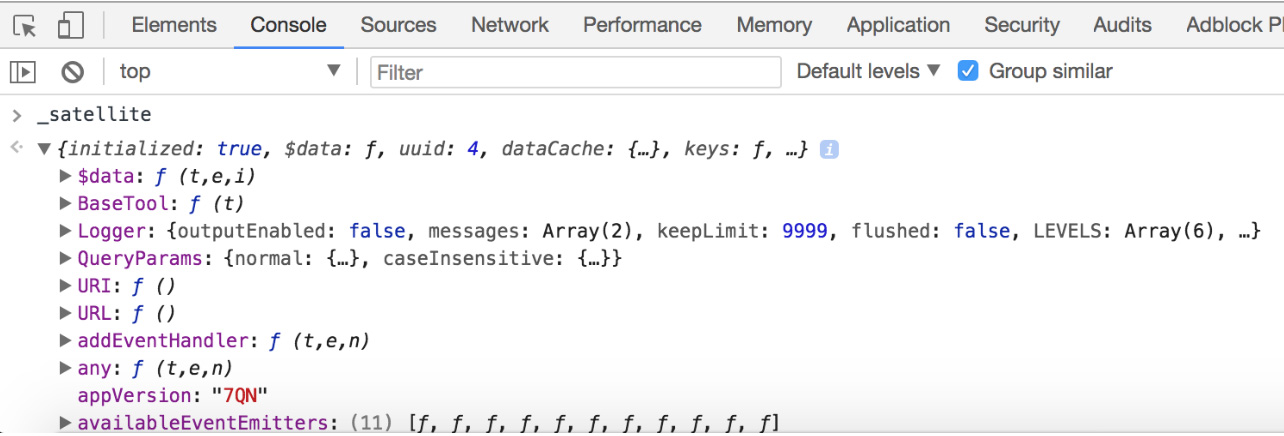
Fig: Satellite Object
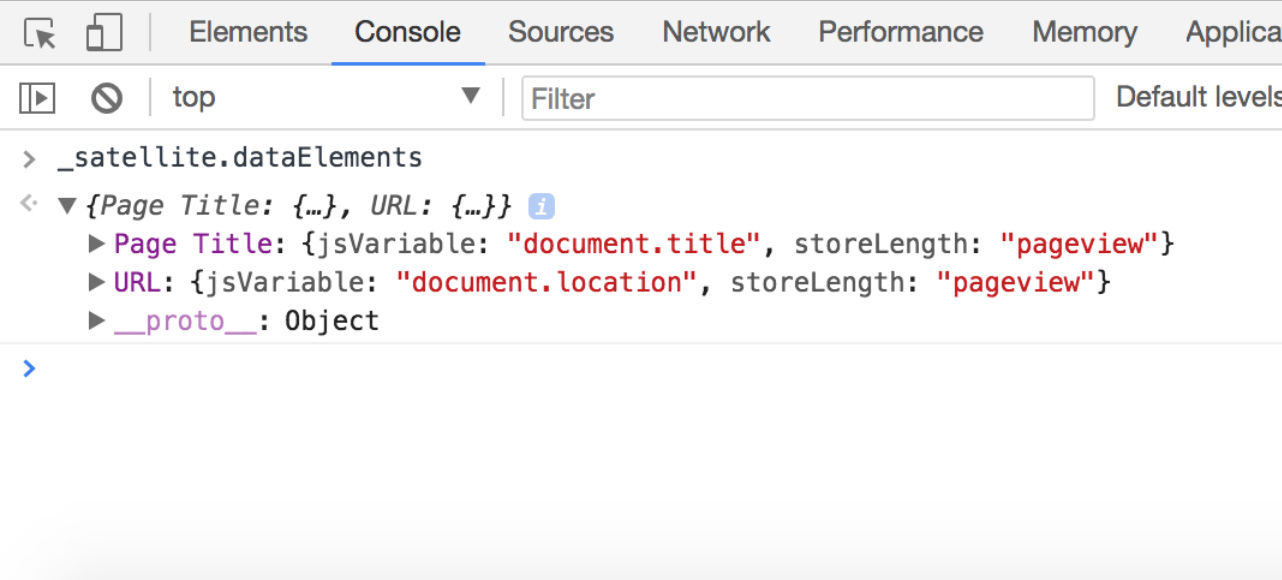
Fig: Satellite Data Elements
DTM Debugging Tools:
In DTM we play with different types of scenarios and scripts, hence we might need to check if the scripts are working fine and order they are getting executed.
There are a couple of browser plugins which proved to be quite useful for debugging.
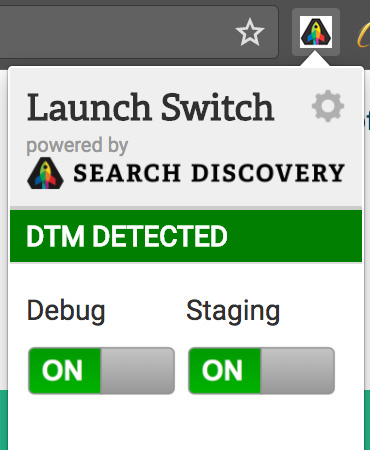
Launch Switch:
It enables the logging in console and as well as we can test the changes using staging script, before making the changes live.
There are two button available on the plugin console. Tweaking them will do the following:
Debug: It enables the logging of the rules, you can also add the logs using _satellite.notify(“info”).
Staging: It will enable the changes you have made in property which you have not published. This is used for testing the changes before making them live.
Download URL for Chrome: https://chrome.google.com/webstore/detail/launch-and-dtm-switch/nlgdemkdapolikbjimjajpmonpbpmipk
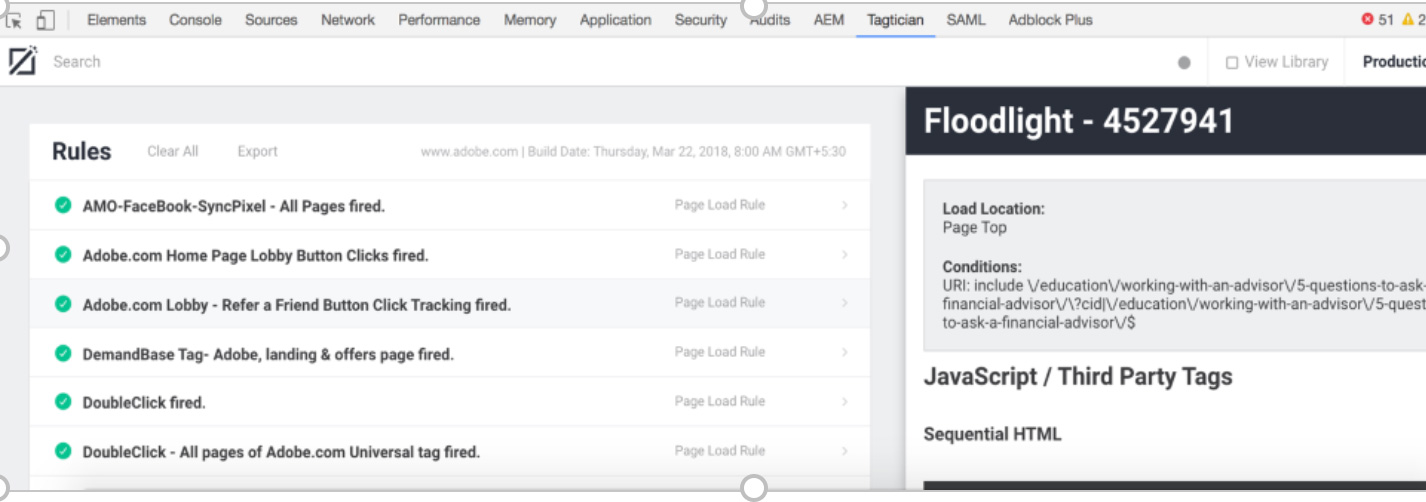
Tagtician:
It shows the detailed information about all the DTM Rules.
Download URL Chrome: https://chrome.google.com/webstore/detail/tagtician-for-adobe-dtm/hiaoiehpkillodoeillmodjcadmfmcbg
Reference:
Adobe DTM Documentation: https://marketing.adobe.com/resources/help/en_US/dtm/
This is the first part of “AEM-DTM-Target Integration. Simplified!” where you have learned how to setup DTM, create DTM property and data elements, integrate DTM with AEM and debug DTM. In Part 2, you will learn how to create different types of rules in DTM, use these rules to share the information to Target, Target activities, Target audience and how to use Target VEC (Visual Enhanced Composer) along with the Target debugging tweaks.

October 1, 2018


Nice Compilation, Sachin!!