
Blogs
In this blog, we will take a beginner’s journey on how to create a workflow in AEM, a launcher and custom steps involved in it.
Let us begin by understanding workflows.
What is a workflow in AEM?
In AEM, a workflow is a well-defined series of steps that allows users to automate the activities in the CMS instance. It consists of various steps, including people (participants), procedures (process) or some tools. The workflow can either be sequential or parallel, when multiple procedures can run parallel to each other. In short, an workflow in AEM is similar to a flowchart which describes the series of procedures to be executed by multiple participants to achieve a desired outcome.
There are many out-of-the-box workflow models readily available for use and we can even write custom workflows which can be tailored as per the business needs of the company.
There are a plethora of use cases for writing workflows depending on the business needs.
For example, the process of publishing a page can be customized and tailored for inclusion of some special participants that need to approve the request for activation or send a mail after approval or rejection.
What are workflow models?
A workflow model is a container or blueprint of the workflow that combines the workflow steps and link them logically.
- It has a start and an end node (plus an optional participant step) by default.
- It can contain different nodes and the transitions that link them. The workflow nodes can get any input from author or can do processing via Java code or ECMA scripts.
- Workflow payload is an important term which is considered as a resource on which workflow will perform its functions.
List of workflows can be seen on http://<host>:<port>/libs/cq/workflow/content/console.html
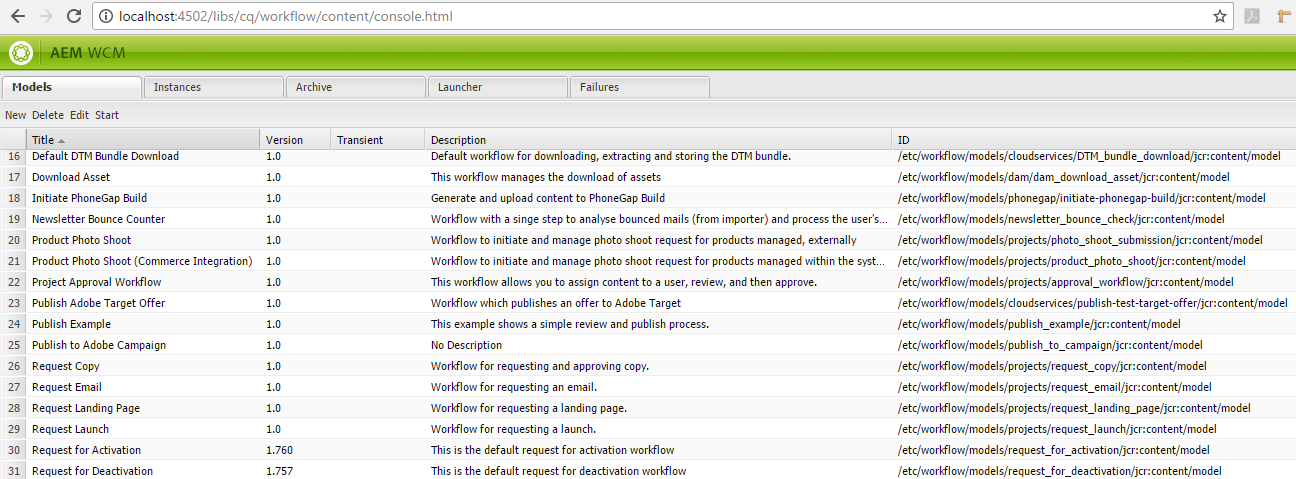
Figure 1: AEM Workflow Console

Figure 2: Tabs in Workflow Console
These are the tabs that contain the information about the workflows.
- Models has workflow models having title of the workflow, version, description, and model id.
- Instances lists the active instances of workflows with status (running, suspended etc.), initiator, start time, workflow model, payload associated with the workflow.
- Archive contains the history of all the workflow instances. It contains the status (completed, aborted etc.), initiator, start and end time, workflow model, payload, workflow title etc.
- Launcher contains the launchers of workflow models that trigger initiation of workflows automatically on some action. It contains fields such as event type (created, deleted, modified), nodetype, globbing or path specified for action of node, condition, workflow model that needs to be triggered, description, value of enabled, exclusion list, run modes.
- Failure shows failed instances of workflow on which some error occurred during execution. The issues can be fixed and workflow instances can be resumed.
Examples of workflow in AEM
Let’s have a look at one of the practical examples of workflow in AEM. To create a new workflow we can add the title and the name (cannot contain spaces) of the workflow by clicking on New tab.
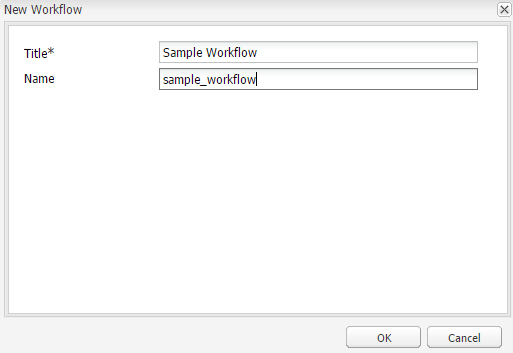
Figure 3: Create a new Workflow Model
Thereafter, we can edit the workflow created to customize it. This is the default view of the workflow wherein there is a start and an end node with a default participant step.
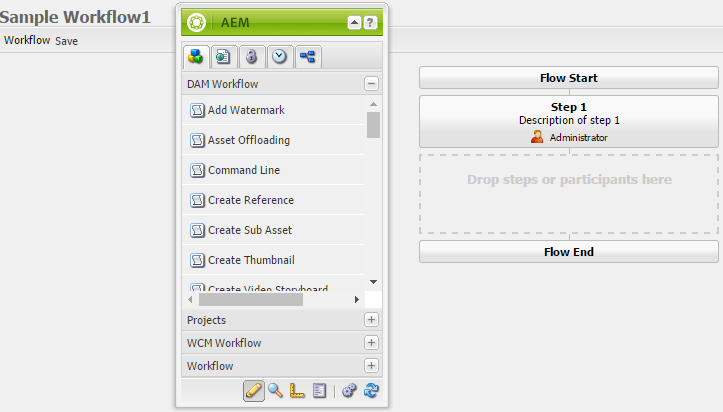
Figure 4: By default view of workflow
We can view the logical layout of the workflow in the console whereas to see the node structure stored for the workflow we can see /etc/workflow/models/sample_workflow.
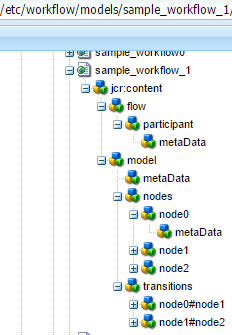
Figure 5: Node structure of workflow in CRX
It contains metadata about the workflow stored in JCR. We can notice flow and model nodes. It has the nodes between start and end node present in the workflow. The model node has all the steps added in the workflow marked as nodes along with the transitions they have between them. We can see the metadata of node 6 in the snapshot since it is a process step having title as Publish Page.
We can see the running instance of the workflow under /etc/workflow/instance path in CRX.
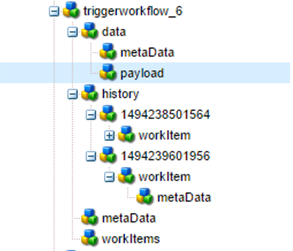
Figure 6: Nodes in trigger workflow instance
This is an example of trigger workflow having data (metadata and payload of which workflow instance is working upon), history, metadata of a particular step and work Items associated with the workflow.
Workflow Nodes
There are many workflow nodes that can be dragged and dropped such as Participant step, process step, and split, or split, dialog participant step, form participant step, container step, goto step etc.
- PARTICIPANT STEP: In this step the user can give
- Title and description and select a user or a group.
- The email option will send an email in the inbox of the user/group.
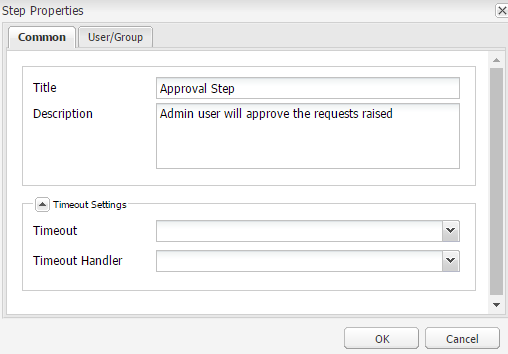
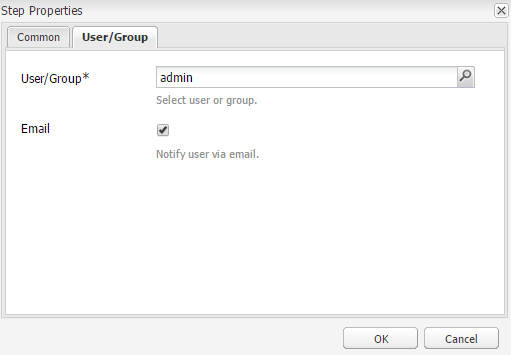
Figure 7: Participant Step
- PROCESS STEP: In this step
- Common tab can contain title and description of the process step.
- There are timeout settings too in which we can set the timeout limit of the workflow after which the timeout handler will start it’s execution.
- In the process tab we select the process from the dropdown (We can add our own process in the list using java).
- We have to check the option of Handler Advance so as to allow the workflow process step to proceed to the next step after performing it’s task.
- There is another field named as Arguments in which we can pass the arguments to the process step for function and task.
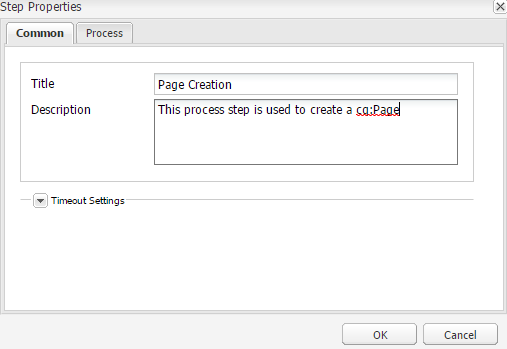
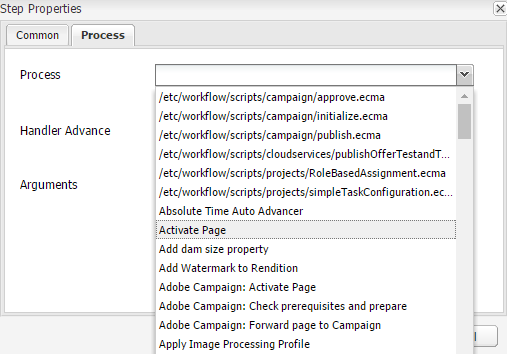
Figure 8: Process Step
Now, to add our own process in the list we have to make a workflow process and register it as a service in java and can add the logical code that will execute on this process step.
@Component(immediate = true, enabled= true, metatype = true)
@Service(WorkflowProcess.class)
@Property(name = "process.label", value = "Create Page Service", propertyPrivate = true)
public class TriggerWorkflow implements WorkflowProcess {

 @Override
public void execute(WorkItem workItem, WorkflowSession workflowSession, MetaDataMap  args)
     throws WorkflowException {
This code snippet shows the basic skeleton of a workflow process that it required for process step.
@Component will register our Java class as a component with the properties that enables it immediately and helps it get the metadata provided by the execute method of WorkflowProcess class.
@Service will register our Java class as a service to be used in the Workflow process.
@Properties will add certain properties such as process.label which will show our class in the process list of the process step. The value of this property will be shown in the drop down list.
The Java class should implement WorkflowProcess interface and give definition to execute method. This method provides three arguments namely WorkItem, WorkflowSession, MetaDataMap.
- WorkItem defines the currently started java process. It contains the data of the workflow and can be fetched using this argument such as Id, workflow, workflow data etc. We can access the workflow object using this. We can get payload of the data using a method of workItem.
String payload = workItem.getWorkflowData().getPayload().toString();
- WorkflowSession controls the workflow by providing methods that can deploy, complete, create, start, stop, resume, suspend, retrieve, complete workflow models, instances or user/groups. We can start another workflow using workflow session of current workflow.
- MetadataMap is a Map<String, Object> of properties that are entered in the dialog of the process step. We can fetch the list of the arguments from metadata map.
There can be many other types of steps that can be configured within the workflow and can be tailored using java code, scripts, parameters etc. to provide the desired functionality.
- An OR SPLIT can be used to introduce branching in the workflow with which only one branch of the workflow can be activated (conditional) based on the script which is mentioned in the dialog.
- The user can give either the path of the script or can write ECMA script in the given tab.
- The Common tab has an option to select the number of branches required in the OR Split.
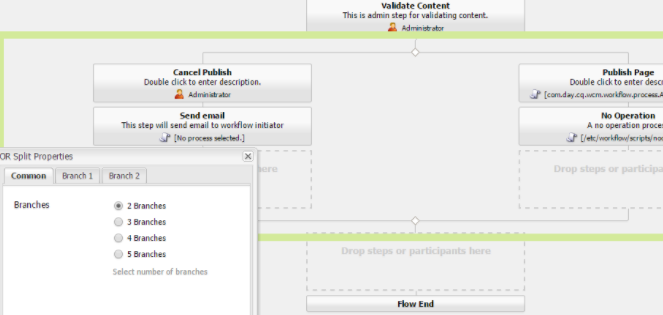
Figure 9: OR Split (marked with green)
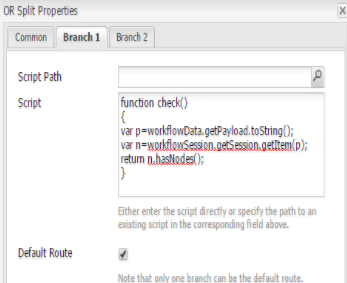
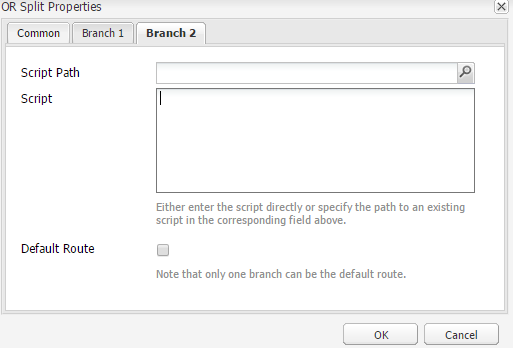
Figure 10: ECMA script written for branch 1 (set as default route).
We can write different condition for branch 2 or can upload a script.
- AND SPLIT wherein all the branches go parallely and we can execute tasks for multiple processing.
- A CONTAINER STEP can allow another workflow to be executed as a child of the current workflow.This workflow is a sub-workflow that can be instantiated. Another way of performing the same action is via Java code where we can start a workflow using workflowSession.
WorkflowModel workflowModel = workflowSession.getModel("/etc/workflow/models/childworkflow/jcr:content/model");
WorkflowData workflowData =
workflowSession.newWorkflowData("JCR_PATH", "/content/bhf/poc/sampleWorkflowPage");

workflowSession.startWorkflow(workflowModel, workflowData);
This code snippet gets the model of the child workflow that needs to be invoked. Thereafter, the data of the workflow is created which is used to start the workflow in the current session.
- GOTO STEP traverses between the steps in the workflow based on the result of the ECMA script. It can be used to implement the use case of looping in the workflow process.
- DIALOG PARTICIPANT STEP is a special scenario of participant step where the user/group needs to give some information that is to be used in the workflow.
- The additional step in this step is to provide a path of the dialog. We have to make that dialog in CRX (/etc/workflows/dialog) and provide the path of that dialog to receive the input from the selected user/group.
- The structure of the dialog should be cq:dialog type. This data can be stored in the form of payload (when we set the value of the property as ./jcr:content/nodename) which can be overwritten in subsequent uses of this dialog.
- The data can also be stored with the work item (when the value is node name) metadata and is persisted with subsequent use of dialog.
Workflow Launchers
Workflow launchers can be used to trigger the workflow based on some event that can be specified in the launcher. We can add a launcher under the Launcher tab.
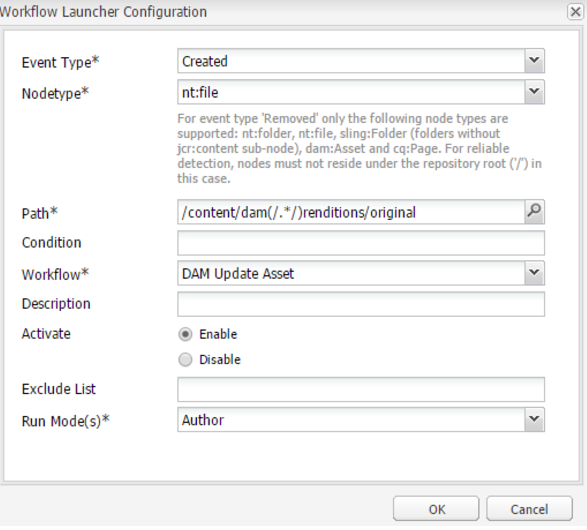
Figure 11: Creation of Launcher for Workflow in AEM
- Event type can be either created, modified or deleted i.e. the action on which the launcher will trigger the workflow mentioned.
- Nodetype is for the type of the node on which the launcher will apply to start the workflow.
- Path specifies the path on which this action will be applied to during the workflow initiation i.e. on the which the launcher of the workflow will be applied to.
- Condition tab determines the condition to be applied when the workflow is launched. This is optional in case a user wants to start the launcher based on a specific condition only.
- Workflow Launcher needs to be associated with a workflow model so that it can be determined that what will be triggered with the help of this launcher.
- Description can be set and activate should be enabled to enable the launch of the workflow launcher.
- Exclude list is a comma separated list of JCR events or items to be ignored via workflow triggering.
- Run modes in this dialog is to specify the server on which this will be applied to (author, publish, author & publish).
Hope you understood the basics of creating workflow in AEM and try to implement this in one of the use cases you experience.
We can explore workflows in detail in future articles.
Other articles related to workflow in AEM:
1) Triggering a Workflow using Event Listeners in AEM
2) Workflow Purge Scheduler

June 9, 2017


Nice one.